The sharp, limiting pain of Pelvic Girdle Pain (PGP) in pregnancy isn’t something you just have to endure; it’s a signal to learn how to work *with* your body.
- Targeted yoga movements provide immediate relief by creating space in the pelvis and back, directly addressing the source of PGP.
- Specific breathing techniques go beyond simple relaxation, actively rewiring your nervous system’s response to pain signals during contractions.
Recommendation: Instead of focusing on a rigid birth plan, focus on building an internal toolkit of movement and breath. This embodied knowledge is what truly empowers you to navigate labor with confidence.
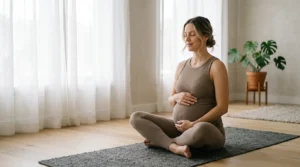
That deep, sometimes sharp, and often relentless pain in your pelvis and lower back—what many know as Pelvic Girdle Pain or PGP—can make the final months of pregnancy feel like an endurance test you didn’t sign up for. As a yoga teacher specializing in pregnancy, I see so many women who feel their bodies are working against them. They’re told to « take it easy, » which often translates to feeling powerless as their world of movement shrinks. The common advice revolves around pain medication or simply waiting it out, but this overlooks a powerful truth.
Many turn to general prenatal yoga, which is wonderful, but often misses the specific needs of a body experiencing PGP. The solution isn’t just to stretch; it’s to understand the precise biomechanics of your changing pelvis and learn how to create space, stability, and ease from within. It’s about moving from a mindset of pain management to one of active, empowered preparation.
But what if the key wasn’t just in the poses you do, but in understanding the profound neurological connection between your breath, your body, and your perception of pain? This is where we move beyond generic advice. This article isn’t just a list of exercises. It’s a guide to building an internal toolkit. We’ll explore how specific movements can offer immediate relief, how breathing can become your most powerful tool for contractions, and how this entire practice translates into a birth plan that isn’t just a piece of paper, but a lived, embodied reality.
This guide is structured to walk you through this journey. We will start with immediate relief for your back and pelvis, then explore how to use yoga for optimal positioning and pain management during labor, and finally, show you how to communicate your needs effectively within a medical setting like the NHS.
Table of Contents: Struggling With Pelvic Pain in Pregnancy? How Prenatal Yoga Unlocks Mobility and Eases Labor
- Cat-Cow Stretch: Why Is This The #1 Move for Pregnancy Backache?
- Spinning Babies: Can Yoga Poses Help Turn a Breech Baby?
- Golden Thread Breath: How to Use Breath to Manage Contractions?
- Squatting: How to Open the Pelvis for Birth Without Strain?
- Yoga Safety: Which Poses Should You Avoid After 20 Weeks?
- Pelvic Floor Exercises: Why Start Before Birth to Prevent Issues Later?
- Epidural vs Gas & Air: What Are the Pros and Cons of NHS Pain Relief?
- How to Write a Birth Plan That NHS Staff Will Actually Read?
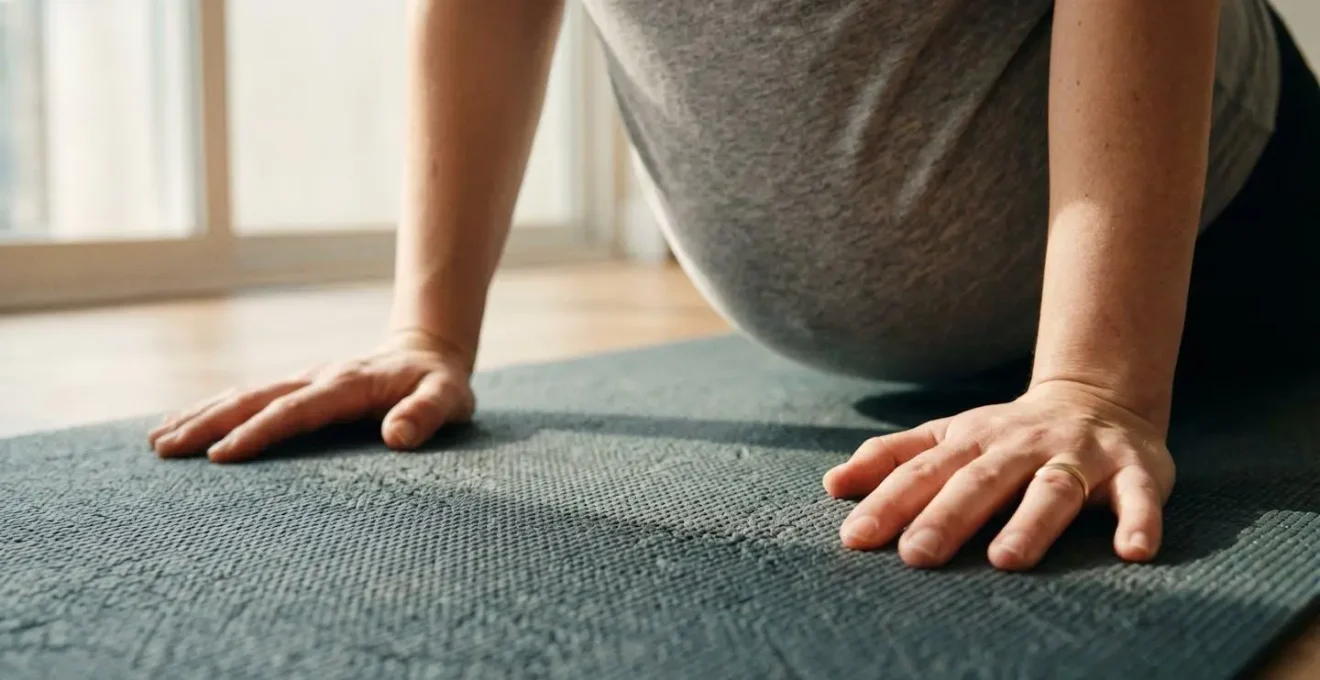
Cat-Cow Stretch: Why Is This The #1 Move for Pregnancy Backache?
If you’re feeling that familiar ache deep in your lower back and pelvis, you’re not alone. In fact, research shows that sacroiliac (SI) joint pain, a major component of PGP, affects nearly 50% of pregnant people. This pain arises because the hormone relaxin, while preparing your body for birth, makes the ligaments supporting your pelvic joints more lax. The Cat-Cow stretch, when performed mindfully, becomes less of a simple stretch and more of a therapeutic movement specifically for this issue.
The magic is in the gentle, controlled mobilization. As you move into the ‘Cow’ pose (arching your back, lifting your sit-bones), you create a subtle opening and forward tilt of the pelvis, relieving compression on the sacrum. As you round into ‘Cat’ (tucking your tailbone), you create a gentle counter-stretch, releasing tension in the lower back muscles that have been working overtime to stabilize your pelvis. It’s a direct, mechanical answer to the discomfort.
This paragraph introduces a complex concept. To better understand it, it’s helpful to visualize its key components. The illustration below breaks down this process.
As Hinge Health Physical Therapists note, this movement isn’t just about stretching. As they put it:
Seated cat cow improves mobility in your lower spine, relieves pressure in the SI joint, and stretches tight lower body tissues.
– Hinge Health Physical Therapists, Hinge Health – Sacroiliac (SI) Joint Pain in Pregnancy: Tips and Exercises
Think of it as gently flossing the joints of your pelvis, creating space and fluidity where there was once stiffness and pain. It’s the first step in reclaiming your body and realizing you have the tools to influence how you feel. This simple movement, done daily, can transform your experience of pregnancy.
Spinning Babies: Can Yoga Poses Help Turn a Breech Baby?
As your due date approaches, the focus shifts from managing pregnancy discomforts to preparing for the birth itself. One of the biggest anxieties can be the baby’s position. A breech presentation (bottom or feet first) can often lead to recommendations for an External Cephalic Version (ECV)—a medical procedure to manually turn the baby—or a scheduled cesarean. While ECV is a valid option with a greater than 50% success rate at 37 weeks, many mothers seek less invasive ways to encourage their baby into an optimal head-down position first.
This is where practices like Spinning Babies, which heavily utilize yoga-based principles, come in. It’s not about forcing the baby to turn. It’s about creating space. The philosophy is simple: balance the pelvis and release tension in the surrounding ligaments and muscles, and the baby, in its wisdom, will often find the most optimal position for birth. Poses like forward-leaning inversions and side-lying releases are designed to untwist tight ligaments (like the round ligament) and create more room in the lower uterus, giving the baby the freedom to move.
It’s about working with gravity and your body’s anatomy to create an inviting space for your baby to turn. This proactive approach can feel incredibly empowering, shifting the narrative from one of anxiety to one of active participation in your birth preparations. The results can sometimes be astonishing.
Case Study: Spontaneous Version at 37 Weeks
A mother was told at 36 weeks that her frank breech baby had a less than 3% chance of turning. Her midwives recommended either an ECV or a cesarean section. After diligently performing Spinning Babies exercises, she went for her 37-week scan. The baby had turned head down. The sonographer was stunned, stating she had never seen it happen before and believed it was anatomically impossible for a baby to turn that late. The mother went on to have her planned home water birth, a testament to the power of creating space.
Golden Thread Breath: How to Use Breath to Manage Contractions?
Of all the tools in your labor toolkit, your breath is the most powerful, portable, and profound. We’re often told to « just breathe » during labor, but without a specific technique, that advice can feel useless in the face of an intense contraction. The Golden Thread Breath is a game-changer. It’s a simple yet incredibly effective technique: you inhale slowly through your nose, allowing your belly to expand, and then you exhale even more slowly through softly pursed lips, as if you’re blowing a single, steady, golden thread of air across the room.
The power of this technique is not mystical; it’s neurological. The slow, controlled exhalation is the key. It actively stimulates the vagus nerve, which is the main highway of your parasympathetic nervous system—the « rest and digest » system. Activating this system acts as a natural brake on the stress response (the « fight or flight » system) that can cause your muscles to tense and amplify pain during labor. A randomized controlled trial demonstrated that breathing exercises led to a statistically significant reduction in perceived labor pain.
Essentially, with each Golden Thread Breath, you are sending a signal to your brain that you are safe. This helps to modulate pain perception, keep your jaw and pelvic floor relaxed (they are deeply connected), and ensure a steady supply of oxygen to your uterus, making contractions more effective. It turns your breath from an unconscious reaction into a conscious, powerful tool for managing intensity, one contraction at a time.
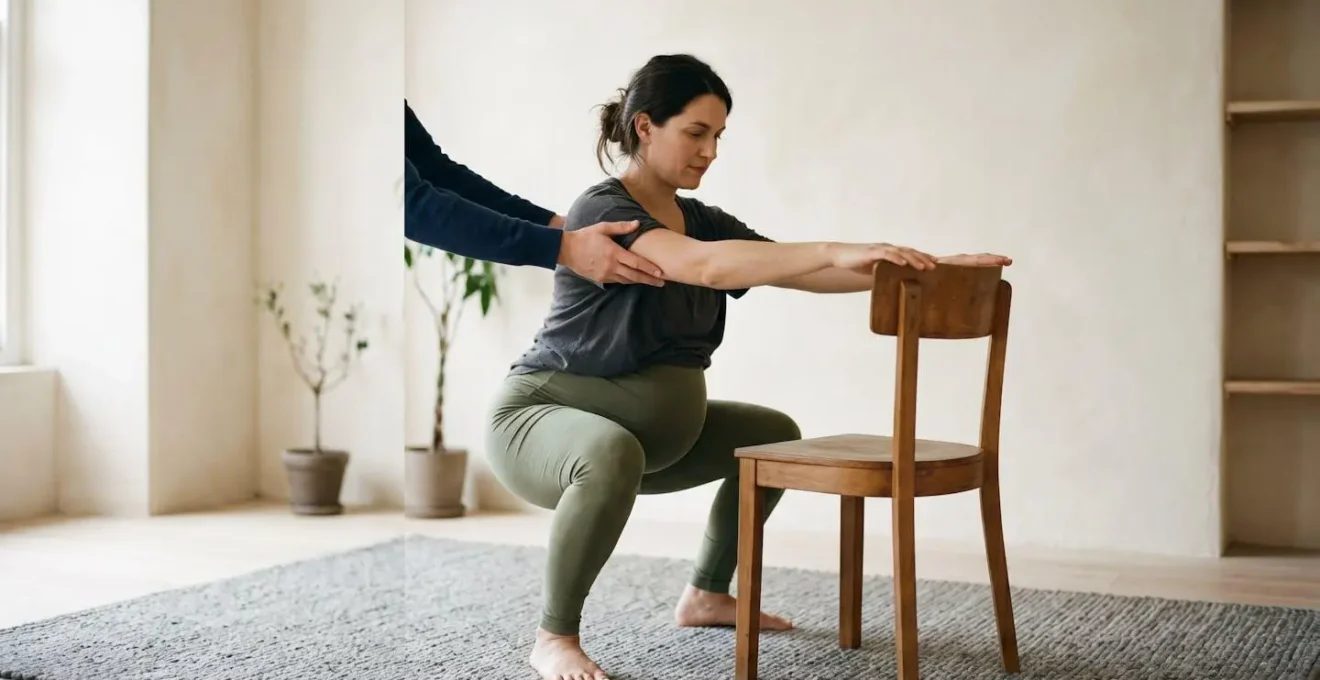
Squatting: How to Open the Pelvis for Birth Without Strain?
Squatting is a primal, powerful position for birth. It uses gravity to its full advantage and can increase the diameter of your pelvic outlet by a significant amount, giving your baby more room to descend. However, for a body already dealing with PGP or the general instability of pregnancy, the idea of a deep squat can be intimidating. The key is not to force it, but to find supported and modified variations that work for you, and to practice them long before labor begins.
Building « squat-ability » is a gradual process. Start with supported wall squats to build leg strength without strain. Use a yoga strap or a partner’s hands for balance as you explore a deeper range of motion. The goal is to be able to relax into the position, releasing the pelvic floor rather than tensing against the intensity. During labor, a supported squat, where you hang from a partner’s arms or hold onto a bed rail, can be an incredible position for the pushing stage. It maximizes pelvic opening while allowing your upper body to rest.
This is not about achieving a « perfect » yoga-class squat. It’s about finding the version that feels stable and productive for your body in the moment. Even a semi-squat or using a birth ball provides many of the same benefits. The following menu offers options for every stage.
The key takeaway is that squatting is a versatile tool. Learning a few variations gives you a « squatting menu » to choose from during labor, allowing you to adapt the position to your energy levels and the specific stage of labor you’re in, ensuring you get the benefits without the strain.
Yoga Safety: Which Poses Should You Avoid After 20 Weeks?
As your body changes, so must your yoga practice. After 20 weeks, your growing uterus and the effects of the hormone relaxin require specific modifications to keep both you and your baby safe. It’s less about a long list of « forbidden » poses and more about understanding the core principles of safety. Once you know the ‘why’ behind the modifications, you can confidently adapt almost any yoga class.
The four main principles to remember are: avoid deep core compression, prevent lying flat on your back, account for joint instability, and manage balance risks. For instance, any pose that involves lying on your back (like Savasana) can compress the vena cava, a major vein, reducing blood flow. The simple fix is to prop yourself up on bolsters or pillows into a supported reclining position. Similarly, deep twists or intense forward folds can put undue pressure on the abdomen. The solution is to twist from the shoulders, keeping the belly spacious, and to fold with a wide-legged stance.
Even a classic like Cat-Cow needs a rethink. As your abdominal muscles stretch, excessive arching and rounding can put pressure on the linea alba, potentially exacerbating diastasis recti. As the experts at Utah Prenatal Yoga advise, a new approach is needed.
Traditional Cat-Cow can lead to over-stretching and excessive core pressure. The New Cat-Cow keeps the neck neutral and prioritizes movement around the pelvis.
– Utah Prenatal Yoga, The New Cat-Cow: Pregnancy-Safe Yoga Pose
This « New Cat-Cow » involves smaller, more pelvic-focused movements, which still provides the SI joint relief we discussed earlier without the risks. This embodies the spirit of prenatal yoga: not abandoning the practice, but adapting it with wisdom and respect for your body’s current needs.
Pelvic Floor Exercises: Why Start Before Birth to Prevent Issues Later?
The pelvic floor is one of the most misunderstood and vital muscle groups for pregnancy and birth. We often hear about Kegels, and while strengthening is important, a truly functional pelvic floor is one that can also fully release. During pregnancy, it’s working hard to support the weight of your growing baby. During birth, it needs to be able to relax and stretch to allow your baby to pass through. A pelvic floor that is too tight (hypertonic) can be just as problematic as one that is too weak.
Prenatal yoga teaches this crucial balance. Through coordinated breathwork, you learn to feel the subtle lift of the pelvic floor on an exhale and, more importantly, the full, gentle release and expansion on an inhale. This is the opposite of the forceful pushing often depicted in movies. It’s a practice of « breathing your baby down. » This mind-body connection not only prepares the tissues for birth but has been shown to have a direct impact on labor itself; research demonstrates that prenatal yoga exercise shows a negative correlation with the duration of the second (pushing) stage of labor.
Starting these exercises early is an investment in your future self. A strong, supple, and responsive pelvic floor is less likely to tear during birth, recovers more quickly postpartum, and significantly reduces your risk of issues like incontinence and prolapse later in life. It’s about preparing not just for one day of labor, but for a lifetime of pelvic health. This isn’t just an exercise; it’s a foundational skill for birth and beyond.
Epidural vs Gas & Air: What Are the Pros and Cons of NHS Pain Relief?
While the yoga tools we’ve discussed are incredibly powerful, it’s also wise and empowering to understand the medical pain relief options available, especially within the NHS. Thinking about them beforehand, without judgment, allows you to make an informed choice if and when the time comes. The two most common options are Gas and Air (Entonox) and an epidural.
Gas and Air is a mixture of oxygen and nitrous oxide that you breathe in through a mouthpiece at the start of a contraction. It doesn’t eliminate pain, but it can take the « edge » off, making it more manageable. Its main advantage is your control; you decide when and how much to use, and it wears off quickly. This means you can still be mobile and use different laboring positions. The downside is that some women find it makes them feel lightheaded or nauseous, and for some, it simply isn’t strong enough.
An epidural, on the other hand, is a much more powerful form of pain relief. It’s a local anesthetic administered by an anesthetist into your lower back, which numbs the nerves from the waist down. For many, it provides a complete respite from the pain of contractions, allowing them to rest. However, this comes with trade-offs. You will be confined to bed, your blood pressure will be continuously monitored, and it can sometimes slow down the pushing stage or increase the likelihood of an assisted delivery (forceps or ventouse). It’s a medical procedure with its own set of risks and benefits.
| Feature | Gas & Air (Entonox) | Epidural |
|---|---|---|
| Pain Relief Level | Mild to Moderate (takes the edge off) | High (often complete numbness) |
| Mobility | Full mobility maintained | Confined to bed |
| Control | Patient-controlled, used as needed | Administered by anesthetist, continuous |
| Common Side Effects | Light-headedness, nausea, dry mouth | Drop in blood pressure, potential headache, itching |
| Impact on Labor | Minimal | Can slow second stage, may increase need for assistance |
There is no « right » choice. The purpose of your yoga practice is not to guarantee a drug-free birth, but to give you a deep well of resources to draw from. Understanding these medical options is simply adding another layer to your knowledge, allowing you to have a confident dialogue with your care team.
Key Takeaways
- Pelvic Girdle Pain (PGP) is a mechanical issue that can be actively managed with specific yoga movements that create space in the SI joint.
- Effective labor breathing isn’t just about relaxation; it’s a neurological tool (like the Golden Thread Breath) that stimulates the vagus nerve to actively modulate pain signals.
- An effective birth plan is a communication tool, not a script. Translating your preferences (e.g., « I will use vocalization ») into language medical staff understand is crucial for it to be respected.
How to Write a Birth Plan That NHS Staff Will Actually Read?
The infamous birth plan. Many of us pour our hearts into writing a detailed document, only to feel it was ignored in the heat of the moment. The disconnect often happens because a birth plan is seen as a rigid list of demands, which doesn’t fit the dynamic nature of labor. As a yoga teacher, I encourage my students to see their birth plan not as a script, but as the final expression of their embodied practice—a communication tool designed for a real-world hospital setting like the NHS.
The key is to translate your preferences into concise, actionable, and respectful language that a busy midwife can grasp in seconds. Instead of writing, « I want a calm, unmedicated birth, » which is subjective, try, « To manage contractions, our first preference is to use movement, specific breathing techniques (Golden Thread), and a quiet environment. » You are not just stating a wish; you are showing you have a plan and a set of skills.
Think of it as a bridge. You’ve spent weeks or months practicing how to move, how to breathe, and how to focus. The birth plan is your opportunity to bridge that internal work with the external reality of the labor ward. Using clear, simple language and focusing on your coping strategies rather than just outcomes makes your plan a tool for collaboration, not conflict. It signals to your care team that you are an active, informed participant in your own birth story.
Your Action Plan: Forging a Birth Plan That Works
- List Your Tools: Write down all the natural coping mechanisms you have practiced. Examples: ‘Golden Thread Breath for contractions,’ ‘vocalization/sounding,’ ‘using squatting positions,’ ‘partner applying hip squeeze.’
- Translate to Medical-ese: For each tool, write a concise, one-sentence preference. Instead of ‘I want to move freely,’ write: ‘Preference is to remain mobile and use upright positions for as long as possible.’
- Create a Visual Summary: Design a simple one-page sheet with icons or bold headings for key preferences (e.g., a symbol for ‘Upright Positions,’ a line saying ‘Delayed Cord Clamping’). This is for quick reference by staff.
- Plan for Scenarios: Structure your plan with « If/Then » preferences. ‘For an unmedicated labor, our preferences are…’. ‘If induction is recommended, our preference is to discuss options before proceeding…’. ‘In the event of a C-section, our priorities are…’
- Discuss and Share: The most important step. Use this document as a script to have a clear conversation with your birth partner and your midwife *before* labor begins. The goal is shared understanding.
Ultimately, the value of the birth plan is in the process of creating it. It forces you and your partner to think through your options, to learn the language, and to solidify your own coping strategies. It transforms you from a passive patient into the confident, knowledgeable leader of your birth team.