
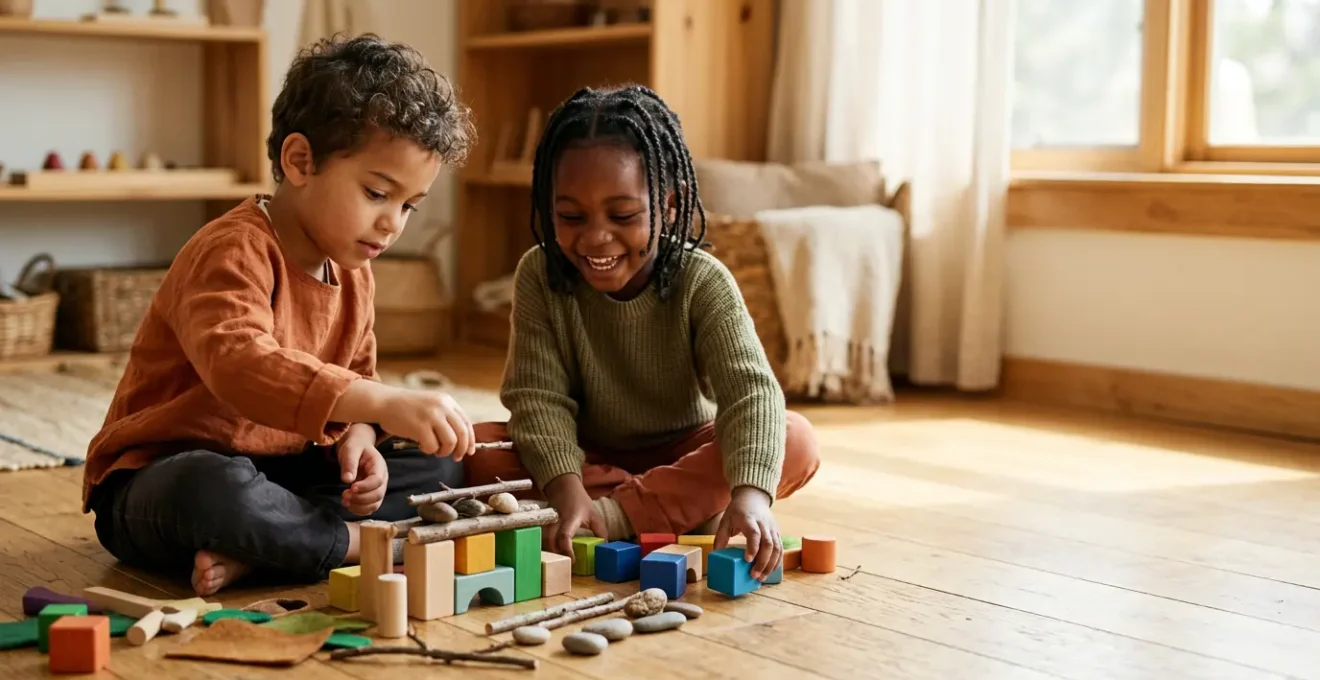
You don’t need a lab coat or a degree to teach your preschooler STEM; the key is simply to nurture the curiosity they already have.
- STEM for young children isn’t about formal lessons, but about playful exploration and asking “What if?”.
- Everyday materials like paper, baking soda, and bathtub toys are the only equipment you need to explore foundational concepts in physics, chemistry, and engineering.
Recommendation: Start by choosing one activity that aligns with your child’s current interest—whether it’s cars, bugs, or making a mess—and frame it as a fun game of discovery.
The term “STEM” can feel intimidating. For many parents, it conjures images of complex equations, bubbling beakers, and coding languages—a world far removed from the everyday chaos of life with a preschooler. There’s a common pressure to ensure our children are prepared for a tech-driven future, leading many to believe they need to be experts in Science, Technology, Engineering, and Math to give their kids a head start. This often leads to either avoidance of the topic altogether or buying expensive “educational” toys that gather dust.
But what if the entire premise is flawed? What if STEM for a preschooler isn’t about structured learning but about harnessing their boundless, chaotic, and wonderful curiosity? Children are natural scientists. They are constantly testing hypotheses (“What happens if I drop this spoon again?”), engineering solutions (“How can I stack these blocks to reach the toy?”), and collecting data (“This bug has lots of legs!”). The real opportunity isn’t to *teach* them STEM from scratch, but to provide a language and a framework for the discoveries they are already making every single day.
This guide moves past the pressure and the jargon. It reframes STEM as a series of simple, playful “what if” questions that you can explore together using items you already have. We will show you how to turn a pile of paper into an engineering lesson, a walk in the park into a data science project, and bathtime into a physics lab. It’s about building a mindset of inquiry and resilience, not about getting the “right” answer. By the end of this article, you’ll see that you are already your child’s best STEM ambassador, equipped to turn their endless “Why?” into a shared adventure of discovery.
This article provides a practical roadmap for integrating these concepts into your daily routine. Here is a summary of the simple yet powerful activities we will explore together.
Summary: Simple and Engaging STEM Activities for Young Minds
- Bridge Challenge: Can You Build a Bridge for a Toy Car with Paper?
- Coding without Computers: Giving Instructions to a “Robot” Parent
- Baking Soda Volcano: The Classic Chemistry Experiment
- Rain Gauge: Making a Simple Weather Station
- Bug Hunt: Sorting Insects by Number of Legs
- Sink or Float: Teaching Physics in the Bathtub
- Kids’ Patches: Giving Ownership of a Square Meter of Soil
- Encouraging Outdoor Activities: Raising Wild Kids in a Digital World
Bridge Challenge: Can You Build a Bridge for a Toy Car with Paper?
Before you even begin, it’s important to recognize that children are constantly engineering their world. As education experts Beth Van Meeteren and Betty Zan point out, they are driven to modify their environment to meet their own goals. This activity simply gives that impulse a fun, focused challenge.
Young children are engineers in the sense that they modify the world to satisfy their own needs and wants.
– Beth Van Meeteren & Betty Zan, Revealing the Work of Young Engineers in Early Childhood Education, Early Childhood Research & Practice
The setup is simple: two stacks of books as pillars and a few sheets of paper. The question: “Can we build a bridge strong enough for this toy car?” The first attempt, a single flat sheet, will likely fail. This is not a failure; it is the first data point. This is where the engineering mindset begins. Ask questions: “What happened? What could we do to make the paper stronger?” Guide them to fold the paper into a fan (corrugation) or roll it into tubes. Each new design is a new hypothesis. The goal isn’t a perfect bridge; it’s the process of testing, observing, and improving.
This isn’t just about building. A study on preschool engineering confirmed that these challenges serve as a platform for children to practice skills across multiple domains. When a child tries a new design and it works, they learn about structural integrity. When they ask a friend for help, they are practicing collaboration. Research shows that young children can meaningfully participate in inquiry-driven engineering activities, developing problem-solving skills and resilience in the face of setbacks. This simple paper bridge challenge teaches a fundamental lesson: problems have solutions that we can discover through experimentation.
Coding without Computers: Giving Instructions to a “Robot” Parent
The word “coding” can be the most intimidating part of STEM. But at its core, coding is simply about providing clear, step-by-step instructions to achieve a goal. You can teach this foundational concept of unplugged logic without ever touching a screen. The best part? You, the parent, get to be the robot. The mission is for your child (the programmer) to give you instructions to walk from one side of the room to a specific toy on the other.
Start by establishing the “code”: “forward,” “turn left,” “turn right,” “pick up.” Then, follow their instructions *exactly*. If they say “Go forward,” but don’t say “Stop,” you might just keep walking until you gently bump a wall. This isn’t being difficult; it’s demonstrating the importance of precise and sequential commands. These moments of comical error are powerful learning opportunities, showing that a computer (or a robot parent) only does exactly what it’s told. This activity builds crucial computational thinking skills like sequencing, debugging (figuring out what went wrong in the code), and clear communication.
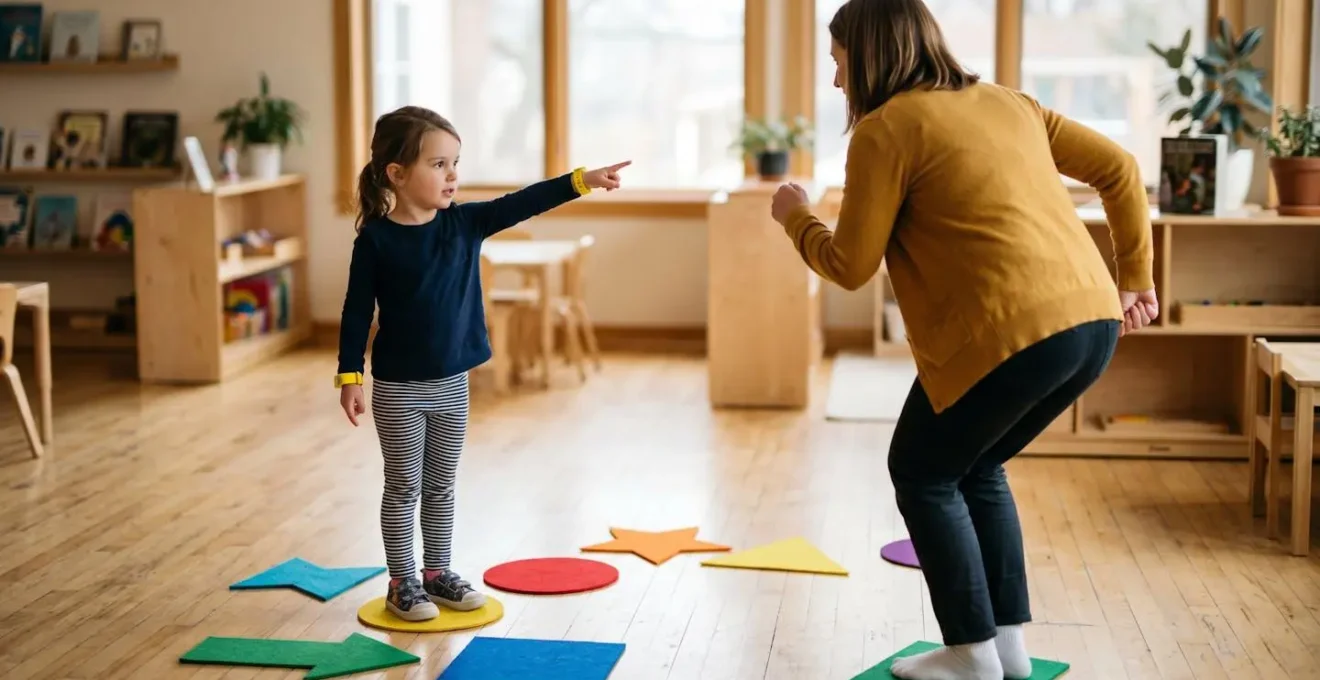
As the visual above suggests, this is an active, engaging process that gets children thinking about order and direction in a physical way. You are translating an abstract goal (“get the teddy bear”) into a concrete sequence of steps. This is a skill that goes far beyond programming. It’s the basis of following a recipe, assembling a toy, or solving a multi-step math problem. And you don’t have to wait until they are older; research shows that even very young children, from ages 2 to 4, can develop computational thinking skills through guided play like this. It’s a game that secretly builds the architecture for logical thinking.
Baking Soda Volcano: The Classic Chemistry Experiment
The baking soda and vinegar volcano is a rite of passage for a reason: it’s a visually spectacular, slightly messy, and incredibly satisfying introduction to chemical reactions. But with a small shift in approach, you can elevate this classic demonstration into a child’s first formal experiment, introducing them to the scientific method. It’s not just about the fizz; it’s about the process of asking, predicting, and observing. Using a simple bottle, some play-doh for the cone, baking soda, and vinegar, you have a complete kitchen-table science lab.
Before you mix anything, you create the “curiosity hook.” Ask, “What do you think will happen when we mix this white powder with this liquid?” Listen to their ideas without judgment. This is the hypothesis phase. Maybe they’ll predict it will change color, get hot, or do nothing at all. All predictions are valid. Then, as you pour the vinegar, encourage them to use their senses. What do they see? (Bubbles, foam). What do they hear? (Fizzing). This is the observation phase. Afterward, you discuss the results. “Was your prediction right? What did we see happen?” You’ve just completed a full experimental loop.
You can extend the experiment by changing variables. “What if we add more baking soda? What about less vinegar? What if we add a drop of dish soap?” Each question is a new experiment, reinforcing the idea that science is an active process of inquiry, not a collection of static facts. By using the correct terminology in a playful context, you are building a foundational scientific vocabulary.
Your Checklist for a Preschooler’s First Scientific Method
- Introduce the vocabulary: Use simple but accurate scientific terms like ‘reaction,’ ‘prediction,’ and ‘observation.’
- Ask for predictions: Before the experiment, encourage children to predict what will happen and explain their thinking. “What do you think the volcano will do?”
- Conduct the experiment: Allow children to actively participate in mixing materials, like scooping the baking soda or pouring the vinegar (with help).
- Discuss observations: After the reaction, talk about what they saw, heard, and felt. “The foam is moving! It’s making a fizzy sound!”
- Ask “What if?”: Encourage further curiosity by suggesting a change for the next time. “What if we tried it with warm water instead?”
Rain Gauge: Making a Simple Weather Station
“Where does rain come from?” “How much did it rain?” These are classic preschooler questions. A homemade rain gauge turns this curiosity about the weather into a hands-on lesson in measurement and data collection—the M in STEM. All you need is a clear plastic bottle, a marker, and a ruler. Cut the top off the bottle, invert it to create a funnel, and place it inside. Use a ruler and permanent marker to draw a simple scale on the side. You’ve just created a scientific instrument.
Place the gauge outside before a rainy day. The anticipation itself is part of the fun. After the rain, the real work begins. Take your child out to the gauge and let them observe the water level. Help them identify the mark the water reached. Is it a little bit of rain or a lot? You can make it even more concrete by creating a simple chart. Each day it rains, they can help you mark the level on the chart. This isn’t just about numbers; it’s about making abstract concepts like “more” and “less” tangible. They are not just learning to count; they are learning that numbers can be used to describe and compare the world around them.
This simple act of measuring and recording is more powerful than you might think. Many parents focus heavily on early reading skills, but research demonstrates that preschool-aged children’s knowledge of math is a better predictor of later academic achievement than early reading or attention skills. By creating a rain gauge, you are not just answering a question about the weather. You are building foundational math literacy, teaching your child that they can use numbers to quantify, track, and understand their environment. It’s a simple tool that opens up a world of quantitative reasoning.
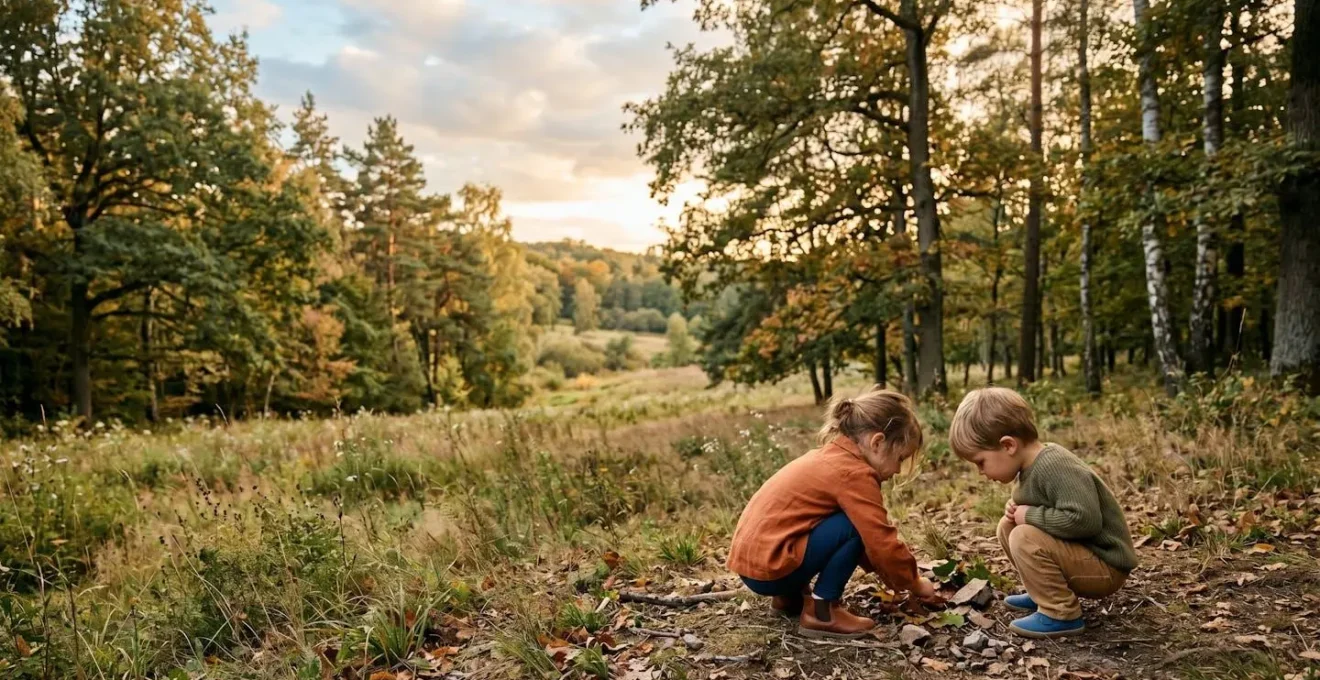
Bug Hunt: Sorting Insects by Number of Legs
The outdoors is a living laboratory, and a simple bug hunt is a perfect expedition. For a preschooler, the world under a rock or on a leaf is a source of endless fascination. This activity channels that natural interest into a lesson on observation, data collection, and classification—foundational skills for both science and math. Armed with a magnifying glass and a gentle touch, your child becomes a field biologist for the afternoon. The goal isn’t just to find bugs, but to observe them closely and sort them based on a specific attribute: the number of legs.
As you find different creatures—a six-legged ant, an eight-legged spider, a many-legged centipede, a no-legged worm—you can start to group them. You can create “piles” or draw circles on the sidewalk for the “six-leg group” and the “eight-leg group.” This is a hands-on introduction to the scientific practice of taxonomy and classification. The child learns to look for specific details and use those details to make sense of the world. It answers the question, “How are these things different, and how are they the same?”
This activity also feeds directly into a preschooler’s developmental stage of intense questioning. In fact, researchers estimate that preschoolers ask an amazing 76 information-seeking questions per hour. A bug hunt provides a rich environment for such questions: “Why does that one have wings?” “Where is it going?” “What does it eat?” You don’t need to know all the answers. The most powerful response is often, “I don’t know, let’s watch and see,” or “That’s a great question, how could we find out?” This models a key scientific trait: valuing questions as much as answers and embracing curiosity as the engine of learning.
Sink or Float: Teaching Physics in the Bathtub
Bathtime is already a daily routine, making it the perfect, low-effort physics laboratory. The “Sink or Float?” game is a classic for a reason: it taps into a child’s natural curiosity about how objects behave in water. The question is simple, but the physics behind it—concepts of buoyancy and density—are profound. Gather a collection of waterproof toys and objects before bathtime: a rubber duck, a plastic block, a waterproof-paged book, a bar of soap, a sponge. The variety is key.
Turn it into an experiment by introducing the scientific method. For each object, ask for a prediction: “Do you think this will sink to the bottom or float on top?” Let them hold the object, feel its weight, and make a guess. This is their hypothesis. Then, they get to test it by placing the object in the water. The splash and the result are the data. Celebrate every outcome, whether it matches the prediction or not. The surprise of seeing a large, light object float or a small, heavy one sink is a powerful learning moment. It challenges their assumptions and builds a more nuanced understanding of the world.
You can take this a step further by turning it into an engineering challenge, directly applying the principles they’ve just observed.
Case Study: The Aluminum Foil Boat Challenge
In one documented preschool classroom, children were given squares of aluminum foil and a small toy figure. The challenge was to design a boat that could carry the toy across a water table without sinking. According to the NAEYC, the children were deeply engaged, first making flat rafts that sank, then instinctively folding up the sides to create more stable boat shapes. They were actively testing, redesigning, and problem-solving, turning a simple physics lesson into an immersive and meaningful STEM experience.
This example shows how a simple “Sink or Float” game can evolve into a hands-on engineering project, teaching not just physics but also the resilience to try again after a design fails.
Kids’ Patches: Giving Ownership of a Square Meter of Soil
Giving a child their own small patch of earth—whether it’s a corner of the garden, a single large pot on the balcony, or a dedicated planter box—is a profound act. It’s an invitation to become a steward of a tiny ecosystem. This “kid’s patch” becomes a long-term, living laboratory for exploring biology, environmental science, and even math and engineering. It transforms them from a passive observer of nature into an active participant. The sense of ownership and responsibility is a powerful motivator for learning.
The process itself is a series of STEM lessons. Planning the garden involves design and spatial reasoning (“Where should the carrot seeds go so they have enough room?”). Preparing the soil is a geology and biology lesson; you can use a magnifying glass to investigate what’s in the dirt—worms, tiny rocks, old leaves. Planting seeds introduces the life cycle, and the daily or weekly act of watering teaches consistency and care. As the first green shoots appear, the real magic begins.
This is where measurement comes in. Create a simple growth journal with your child. They can draw a picture of the plant each week and you can help them measure its height with a ruler. This creates a tangible, visual record of growth over time—a real-life bar chart. They learn about the needs of living things (sun, water, soil) and the consequences of their actions. It also fosters a connection to where food comes from, a critical piece of environmental literacy. This small patch of soil is a microcosm of the planet, teaching lessons about life, growth, and the interconnectedness of living systems.
Key Takeaways
- STEM for preschoolers is about nurturing innate curiosity through play, not formal instruction.
- Simple, everyday household items are the best tools for hands-on exploration of science, engineering, and math concepts.
- The most important role of a parent is to ask “What if?” and celebrate the process of discovery, regardless of the outcome.
Encouraging Outdoor Activities: Raising Wild Kids in a Digital World
In an era of screens and structured schedules, the most powerful STEM laboratory remains the one that is free, endlessly complex, and universally accessible: the great outdoors. Encouraging unstructured outdoor play is perhaps the single most important STEM activity you can foster. It is the culmination of all the skills we’ve discussed: the engineer’s impulse to build, the scientist’s drive to observe, and the mathematician’s need to categorize and measure. A forest, a park, or even a simple backyard provides a rich, multi-sensory environment that cannot be replicated indoors.
Unfortunately, this essential activity is on the decline. A stark reminder comes from a 2021 National Survey of Children’s Health, which found that 37% of children aged 3-5 play outdoors for an hour or less on weekdays. This deficit in outdoor time is a missed opportunity for crucial development. When a child is outside, they are engaging in risk assessment as they decide how high to climb, developing spatial awareness as they navigate uneven terrain, and building resilience as they get up after a tumble. They are conducting physics experiments when they throw a rock into a pond and biology experiments when they follow a trail of ants.
This isn’t just a nostalgic ideal; it’s backed by robust research. One large-scale study of over 9,000 children found that outdoor play provides extensive benefits, including the development of social skills, independence, and spatial awareness. The unstructured nature of outdoor play is its greatest strength. It allows a child to follow their own curiosity, to create their own rules, and to engage with the world on their own terms. It’s here that they can truly be “wild kids,” free to explore, discover, and learn in the most natural way possible. Providing the time and space for this is the ultimate STEM encouragement.
By embracing these simple activities, you are not just teaching STEM; you are fostering a lifelong love of learning, problem-solving, and discovery. The next step is to look at your daily routine and find the first small opportunity to ask “what if?” together.